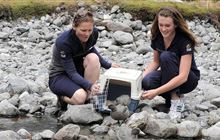
In the “Pingao (or Pikao) the Golden Sand Sedge

Seed Collection and Preparation
Seed Sowing and Germination
Raising Seedlings
Planting Pikao on Dune Sites
Propagation from Cuttings
References

Pikao plants can be propagated using one of three methods;

  • From seed
  • Cuttings
  • Or transplants.

Propagation from seed is the recommended method as parent plants will suffer less injury and seedlings are more adaptable that cuttings or transplants.

Please note that the guidelines below are reproduced from recommendations made in:

  • Pingao on Coastal sand dunes. Guidelines for seed collection, propagation and establishment. CDVN Technical Bulletin No. 1 (1998).
     
  • Pingao the Golden Sand Sedge. Nga Puna Waihanga (1991).
     
  • Pingao Recovery Plan, Otago Conservancy 1993-1998. Department of Conservation, Dunedin.

Seed Collection and Preparation

Pingao seeds are 3-5mm long and 2-5mm wide, about the size of a match head. The shiny brown egg-shaped nuts develop in the 15-30cm long spirally arranged flowerheads. The seeds ripen in late spring and during summer, with more southern populations tending to ripen later than their northern counterparts. This is probably a result of climate differences, as pingao seed ripening periods in a given area will be dependent on the temperature; higher temperatures will bring seeding on earlier. The seeding period, typically 2-4 weeks long will lengthen in areas where there are a large number of plants because of a greater number of seedheads. 

Ripening Periods

  • Auckland Region: mid-November onwards
  • Otago Region: mid-December to January
  • Southland: as late as February

Begin seed collection as soon as seed fall begins (when a little husk or seed is on the ground), and attempts should always be made to collect fewer seedheads from a greater number of healthy plants so some seed is retained locally. It appears that as the seed matures on the seedheads a dormancy mechanism may be enforced making germination more difficult so efforts should be made to collect seedheads as early as possible. 

Harvesting of seed heads should be done with a pair of scissors or sharp knife, cutting the stem below the seedhead. Store the seedheads in a paper or hessian bag rather than a plastic bag as the seedheads will tend to sweat, increasing chances of fungal infection and making the seed more difficult to remove.

Avoid harvesting seedheads when the seeds are not yet ripe (when the seed is a greenish colour). At this stage the seeds are difficult to remove when the seedhead is rubbed, a sign it is not yet ready for collection.

Once the seedheads have been harvested dry them out. Either in the sun, or in a paper bag in a hot water cupboard for about a week. Seeds can be easily separated from the head by either rubbing with your hand or a blunt object. The husk and seed will be removed together and it is not necessary to separate them (thankfully as it is a painstaking process usually involving tweezers). Once the seedheads have been rubbed, scrunch the seed and chaff with your fingers to help loosen the seeds from the husk and spikelet formation.

Seed (and husk) should either be sown immediately to prevent a loss in viability or alternatively they may be stored in plastic bags in the refrigerator for several months until they need to be planted without any apparent loss to viability.

Frequently used Timelines for raising and planting pikao

Cold Climate and no heated glasshouse facilities with protection from the frost

  • Sow seed in autumn
  • Prick seedlings out in early spring
  • Plant in the following autumn to spring period (12-15 month-old seedlings) 

Warm climate or heated facilities

  • Sow seeds in winter
  • Prick seedlings out in spring
  • Plant in the following autumn to spring periods (9-12 month-old seedlings). 

In Otago region

  • Sow seeds in spring
  • Prick seedlings out in late summer
  • Plant in late winter

Seed Sowing and Germination

Forest research trials have found pikao seed easy to germinate with no need for pre-treatment. In Otago, germination success has been found to be more variable and currently research is being conducted to examine any treatments that may improve germination rates. FRI did find variation in seed germination between different sites in one year.

The basic procedure for sowing seeds is as follows:

  • Sprinkle seeds and husk over a firm bed of seed-raising mix of 1:1 peat:sand/pumice in seed boxes.
  • Cover the seeds with a 3-5mm layer of the seed-raising mix or course sand and water.
  • Use of a fungicide (e.g., Capstan) is recommended as pikao seeds are prone to fungal infection.
  • Keep trays moist, FRI place inverted seed boxes over trays to maintain high humidity and provide regular light waterings.
  • When germination begins, remove the covers and ensure protection from rodents and birds. The young shoots are also palatable to snails so poison pellets may be required.
  • Seeds tend to germinate more quickly in warmer months (11-20 days in late summer compared with 26-31 days in winter) and seedlings will be ready for pricking out around 4-8 weeks when they are 7-10cm tall.

Say the following karakia when sowing or planting your pikao:

"Kia tipu tonu koutou, ake ake ake!"
"May you grow on for ever and ever!"

Raising Seedlings

Once the seedlings are 7-10cm tall (when the second leaf is forming), they can be pricked out. FRI has made the following recommendations.

  1. Carefully remove and separate individual plants from the seed tray.
     
  2. Trim long roots and ensure the main tap root is not distorted when replanted.
     
  3. Prick out into one of the following containers 
  • Tinus rootrainers
  • Hillson rootrainers
  • Cardboard milk carton
  • Yogurt pottles
  • PB3/4 or PB2 polythene planter bag
  1. Ensure free drainage for good plant survival
     
  2. Keep humidity to a minimum but keep moist particularly over summer
     
  3. Use a light potting mix (e.g., 3:1 peat:sand/pumice)
     
  4. Fertilise, using either;
  • a slow release fertiliser (e.g., fine Magamp 2-2.5kg/cubic metre)
  • or weekly liquid feeds at half strength (ensuring the plants are not water logged).
  1. Ensure the area is free from browse and maintain regular weeding

Good drainage and low humidity are features of the dune environment so at all times ensure the plants are not water logged and that humidity is kept low. Where rainfall or humidity is high, special precautions will need to be made.

Research has shown well-nourished plants survive better once planted in the wild and that excessive hardening off provides no survival benefits.

Plants will be ready to be planted out into the wild when they have reached 40-50cm in height with a root collar diameter of 5-10mm. When this size is reached will depend on local growing conditions, but will be around 9-15 months. Before planting out, the root system should be large enough to bind the potting mix in the container so that it remains intact during transfer from the container to the planting hole. Therefore this point will be reached earlier with smaller containers.

How to choose what type of container to use

There is a trade off between using smaller or larger plant containers.

  1. Large containers
  • Plants grown in larger containers were found to have faster initial growth rates when planted out into the field.
  • The larger root system may also impart better abilities to cope with dessication.
  1. Small containers (e.g., Hillson rootrainers)

The main benefits of using smaller containers are:

  • Decreased cost per plant to raise ($0.90-$1.20 c.f. larger/older plants @ $2.50 minimum)
  • Take up less space so more plants may be raised
  • Easier to transport so freight costs are reduced and man power is less

Therefore the use of smaller containers may be well suited to large scale replanting programmes, because of cost effectiveness and were the loss of some plants can be buffered.

Ultimately the kinds of containers used will depend on financial and physical constraints as well as the conditions of the sites were replanting is to occur (e.g., large plants may be required at volatile sites to provide greater resilience improving the chances of successful replanting).

Planting Pikao on Dune Sites

General guidelines

  • Site should be exposed, unstable and be bare or sparsely vegetated
  • Planted with slow release fertiliser
  • Planted in spring
  • Planted in clumps of about 20 plants at 50cm spacing 

Site

Pikao plants will perform best on sites that are exposed, unstable and have bare or sparse vegetation cover, therefore they are ideal stabilisation plants for coastal management of erosion or blowouts, particularly if planted with Spinifex, the native sand tussock (not an option in southern areas as Spinifex is only found above Marlborough).

Planting

Planting should be done in clumps of around 20 plants, spaced about 50cm apart. Cutting the 2-3cm of the bottom of the plug will remove concentrations of roots at the ends and will encourage new growth. Plant seedlings fairly deep so that the root collar is buried approximately 5cm into the sand, which improves survival from sand scouring and and increases root contact with moist sand layers. 

Timing

Planting success is greatest in spring as they are exposed to fewer storms but may be susceptible to early drought if the root system is not developed sufficiently. Planting in autumn means plants will be exposed to the mass sand accretion and erosion associated with winter storms, which they may not be able to withstand. FR trials showed that spring plants had significantly higher survival rates after one year when compared with autumn planting (78% c.f. with 41%). 

Application of horticultural aids

Application of a slow release fertiliser at the time of planting is also recommended as it significantly improved growth rates and can improve survival. Application of Hydrogel has no apparent effect on pikao growth or survival. Broadcast application of urea or fast-release nitrogen fertilisers at 200kg/ha to stands of pikao improves vigour, but this should be applied carefully to pikao located near marram so as to ensure marram does not overgrow pikao.

Say the following karakia when sowing or planting your pikao:

"Kia tipu tonu koutou, ake ake ake!"
"May you grow on for ever and ever!"

Propagation from Cuttings

Cutting the tips from healthy plants may be harvested in mid-summer when the most vigorous growth is occuring. At this stage new basal shoots will grow quickly from the parent plant if the growing tip is removed. To ensure there is sufficient food reserves and root initials, make sure the cutting is 4cm (40mm) minimum. Trim the leaves to 1/3 their original length and then the cuttings are then simply planted deeply into a free draining seedling raising mix and kept moist. Roots should begin to appear after a month or so and the mature plants will be ready for planting 6-12 months later.

References

  1. Bergin, D. O. and Herbert, J. W. (1998). Pingao on coastal sand dunes. Guidelines for seed collection, propagation and establishment. CDVN Technical Bulletin No. 1. New Zealand Forest Research Institute Limited.
      
  2. Herbert, A and Oliphant, J. (1991). Pingao: The Golden Sand Sedge. Nga Puna Waihanga.
      
  3. DOC (1992). Pingao Recovery Plan Otago Conservancy 1993-1998. Department of Conservation, Dunedin. 

back to top

Back to top