Avalanche danger from June to November. Check the New Zealand Avalanche Advisory website before starting your trip.
Image gallery
Video
This route is suitable only for people with navigation and high level backcountry skills and experience. Multiple fatalities have occurred here.
The route connects the West Matukituki Valley with the Dart Valley. DOC recommends trampers begin from the Matukituki side as ascending is much safer than descending. The best time to attempt this route is from mid to late summer.
Raspberry Creek car park to Aspiring Hut
Time: 2 hr – 2 hr 30 min
Distance: 9 km
Follow the West Matukituki Track to Aspiring Hut.
Aspiring Hut to Cascade Saddle
Time: 4–5 hr
Distance: 6 km
Camping: Camping on the Cascade Saddle Route is only allowed near Cascade Creek where there is a toilet – this is to limit the impact on this fragile alpine area.
The track is signposted from Aspiring Hut and climbs steadily up through mixed beech forest. There is a stream crossing near the top of the bush – this is unbridged, so assess it carefully and make sure it is safe to cross. It floods and becomes impassable in heavy rain.
Above the bushline the track becomes a route and is marked with orange poles. Use the bush as a decision-point – look at the weather and check in on the time and how you are feeling. There is another 6-9 hours to Dart Hut through exposed terrain. If the weather is deteriorating or you aren’t sure of your ability to complete the tramp, this is the right time to turn around.
The route follows a steep snow grass and tussock ridge with some rocky outcrops and ledges to negotiate. From the bushline, the route is narrow, steep and very exposed - you will need your hands to climb. There are steep drops and the rocks can be slippery, so proceed carefully.
If the route is attempted in reverse (from the Dart) the pylon and orange-poled route must be located before descending into the Matukituki Valley. This section of the route is much more difficult to go down than go up.
If snow is present, do not proceed without an ice axe and crampons and the skills to use them - slipping can mean falling several hundred metres off the cliffs.
The route reaches the pylon at the top of the ridge (1835 m) via a steep and narrow gully that holds snow for much of the year. The final section of the climb is the most dangerous and there is no room for error. It is difficult even in good conditions and especially hazardous if there is snow or strong winds.
At the top of the climb, enjoy the view and use this spot as another decision-point to assess the weather. It is still 6 hours to Dart Hut, so if conditions are poor it may be safer to turn back.
After the pylon follow the poles down to Cascade Creek. Assess the creek and make sure it is safe to cross – rain or snowmelt can flood it. The route then follows to the easy slopes and flats leading to Cascade Saddle (1524 m).
There's a camping site with a toilet near Cascade Creek where there’s a toilet. It's the only suitable camping site along the route. There are often kea at this camping site – kea can chew tents and steal gear.
Cascade Saddle to Dart Hut
Time: 4–5 hr
Distance: 10 km
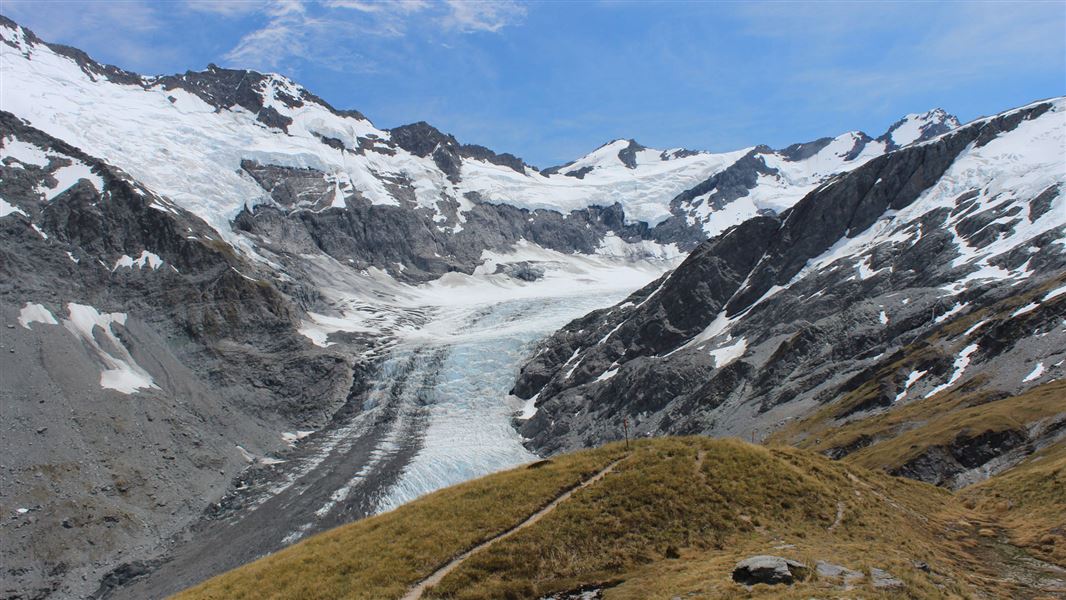
The route to both the Dart and Rees valleys veers off to the left, just before you reach Cascade Saddle. Follow the orange poles along the ridge, then the rock cairns through the steep and unstable slopes down to the valley floor and lateral moraines of the Dart Glacier. The traverse from the ridge to the valley floor is above 1500 metres and very exposed to the weather.
Stay on the true left bank of the Dart River/Te Awa Whakatipu – the left side looking down river. You will need to ford several side streams. The water level rises quickly with either rain or afternoon snow melt, take care in particular with streams further down the valley, close
to Dart Hut.
Slightly upstream from the confluence of the Dart and Snowy Creek, a bridge over the creek leads to Dart Hut.
The track becomes slippery in wet conditions and a fall can be fatal – turn around if weather deteriorates.
Understand if you are ready for the Cascade Saddle Route
Watch the NZ Mountain Safety Council’s walk-through video which takes you through how to prepare for this track. Including facilities, key decision points, hazards and typical conditions for the area.
From Wanaka it is 54 km to the Raspberry Creek car park – the last 30 km is unsealed. The route is then accessed from the West Matukituki Valley, which is the recommended starting point.
Although much more difficult in reverse, the route can be accessed via the Rees-Dart Track.
Public transport is available to and from all the connecting tracks.
This is a very challenging trip
Multiple fatalities have occurred on this route.
Make sure you have the right skills and equipment and be prepared to turn back if conditions are unfavourable – failure to make good decisions while attempting this traverse may result in serious injury or death.
Adverse weather
Cascade Saddle is an alpine crossing and should not be attempted in adverse weather.
Steep snow grass slopes on the Matukituki side become treacherous and slippery when wet or covered with snow and ice. Sudden cold storms with snow affect this area, even during summer.
In early summer, crampons and ice axes may be required.
Avalanches
Be avalanche alert: There is avalanche danger from June to November. View avalanche information and the terrain rating for this track.
Check the New Zealand Avalanche Advisory website before starting your trip.

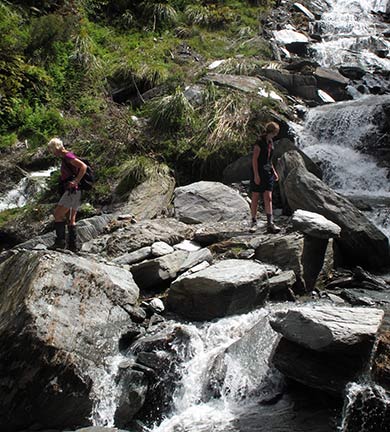
Crossing stream on the route between Matukituki and Cascade Saddle
Image: DOC
You need river crossing skills and to be ready for delays
There are multiple unbridged streams on the Cascade Saddle route. These flood often, both from rain and in nice weather from snowmelt. You need to be able to judge when a river is safe to cross.
It is common on this route to need to wait for rivers to drop before crossing. Carry a tent or emergency shelter, spare food and a head torch. You need to carry these even if you are only doing a day walk from Dart Hut.
There are steep drop-offs and difficult terrain
There are many spots on this route where it is possible to fall large distances, risking serious injury or death. Stick to the route and take extreme care not to slip.
The route is particularly challenging in snow, wet or high wind – it is easy to slip and fall. We recommend against tramping it in these conditions.
In low visibility conditions, navigation is difficult. Follow the marker poles closely.
Tell someone your plans and carry a distress beacon
This is remote tramping, always carry a distress beacon.
Maps
NZTopo50 map sheets: CA10 and CA11
Kea at Cascade Creek campsite
Kea chew tents and steal gear at the Cascade Creek campsite on the Cascade Saddle Route.
In 1939, from the Cascade Camp in the West Matukituki valley, C.E. Smith and A.P. Harper pioneered the Ernie Smith Route to the Tyndall Ridge. Nearly 20 years later a metal pylon was placed on the ridge to guide trampers safely around the bluffs.
The ‘Cullers Route’ was later established from Cascade Hut. The lower section fell into disrepair after a new route was cut from Aspiring Hut, which meets the Cullers Route midway up the bush-clad slopes.
Stay safe in the outdoors
- Choose the right trip for you. Learn about the route and make sure you have the skills for it.
- Understand the weather. Check weather forecasts.
- Pack warm clothes and extra food. Check gear lists.
- Share your plans and take ways to get help. Share directly or use the Outdoor Intentions form or Plan My Walk. Take a distress beacon.
- Take care of yourself and each other.
Wānaka Tititea/Mount Aspiring National Park
Visitor Centre
| Phone: | +64 3 443 7660 |
| Email: | wanakavc@doc.govt.nz |
| Address: | 1 Ballantyne Road Wānaka 9305 |
| Hours: | Visitor centre hours and services |
